THE FUEL TANK
THE
FUEL TANK
RIGHT HAND SIDE
STEP 1: MAKE THE TEMPLATE
Create a template of your desired petrol
tank using the computer-aided program Slicer. This will allow you to create a
precise template using laser-cutting technology. With this model carefully
placed together use hot glue in all adjacent corners to further its strength. Additionally you could also tape the structure. Creating a template will allow you to monitor your work as you go to check your
progress.

STEP 2: SELECT SECTIONS
Placing paper and trace paper over your
model, break your petrol tank up into the appropriate sections and mark them
out with a pencil or marker. Then using a sharp blade or scissors, cut around
the sections you traced. Now you have your shapes for each section.

STEP 3: MARK SECTIONS
Using these shapes cut out from step 2, trace and mark them onto your
aluminium sheets with a pencil or marker. Then, carefully trace over these
markings with a Stanley knife in order to create an exact line to follow when
cutting the shape as precisely as possible.


STEP 4: ROUGH CUT SECTIONS
Next, grab your aluminium sheet and begin to cut out the shape of one section. Ensure to keep fingers clear of the blade and to use another person to hold the other side of the sheet. Ensure to cut approximately 5mm-10mm away from the line. Then repeat this process for the remaining sections.

STEP 5: CUT SECTIONS
Following the previous step, begin to cut directly onto the line marked out on the aluminium sheet. Leaving a couple of millimetres extra on each line allows the majority of sheet metal to be removed from obstruction making it easier for you to cut a smoother and more accurate line. Repeat this step for the remaining sections.

STEP 6: MARK OUT STRIKING AREAS
Using a marker, identify the areas in which you need to appropriate and change whilst leaving other areas blank highlighting areas that do not need to ba altered. This will make the process much more clear and easy to follow, resulting in a more refined outcome.

STEP 7: CREATE THE CURVE
Once your shapes have been cut to size, you can begin the making process. Begin with the main front curve of the petrol tank which is achieved by using the large english wheel with the flat bit attached. This will allow you to create a curved surface without distorting the shape of the metal, but rather keeping it as flat as possible. In this step, ensure to move the piece back and forth changing direction slightly each time. It is important to apply pressure in a downwards motion for each end of the metal to help achieve the curve. Every few rolls, place the piece onto the model and make sure you are creating the right shape and keep referring to it.


STEP 8: CREATE THE LIP
Next, use the sand bag to create the sharp curved lip that connects the sides to the top of the tank. This tool will allow you to shrink the metal allowing you to begin curving the metal into the models shape. Use a rubber mallet to mould the desired shape into the sand bag. Then with the same rubber mallet, create large ripples by striking the metal with the pointy resulting in shrinkage. Slowly begin to hit softer with the larger mallet face smoothing the large ripple out. Continue with this step until you have a rough piece that matches the model. Be sure to place it against the template every few strikes aiming to be as close as possible.


STEP 9: SMOOTH LIP
Following step 8, use the larger end of the rubber mallet and strike the metal sheet against the small cast iron ball. This being hard surface will allow you to completely smoothen the ripples and any shrinkage from step 8. This step should have the most attention applied as this is what will create a beautiful aesthetic. Remember to alway update and check your piece with the model ensuring where the matching parts lie and where you need to keep working on. This should all be clear from the earlier markings made on the sheet in step 6.


STEP 10: ANGLE THE TANK
Next, use the shrinkage tool to bring the bottom of the tank in together to finalise the front of the panel. This will allow the metal to shrink and tighten it so it may create the angle at the front of the tank. Be careful not to pinch the metal too hard as it is difficult to remove any deep marks later.

TIP
Its handy to repeat step 8 after step 9 and 10 to remove any bulges that the round iron ball may have caused and any inconsistencies the shrinking tool may have caused in order to create the natural curve of the petrol tank.
STEP 11: MEASURE AND CHECK
Once you are happy with your shape and that it matches the template, compare it to the other parts in your group to make sure each part lines up to each other as well as the template.If there are any issues, use the the appropriate past techniques to find a solution. Once you and your group are happy, you can move on.

STEP 12: SANDING
The final step is to wet sand the piece with 400pp wet and dry sand paper, followed by 800pp and 1200pp. Dip the sand paper into some water and sand away in a circular motion. This will ensure that all blemishes in the metal have been removed and that the piece is smooth as can be. Follow this with a clean using methylated spirits to remove ant dust and debris from the surface.

TIP:
As an extra aesthetic tip, a metal polish may be applies with a microfibre cloth to bring out a shine in the surface.
Now your project is complete and you now have a petrol tank!!!
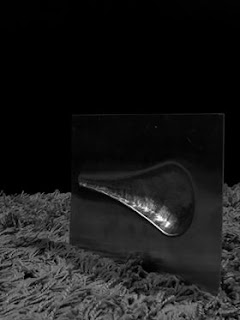
THE FINAL PRODUCT
RIGHT HAND SIDE (LEFT IN PICTURES)


Comments
Post a Comment